
|
|
|
|
Spring Back and Ground Glass Frames
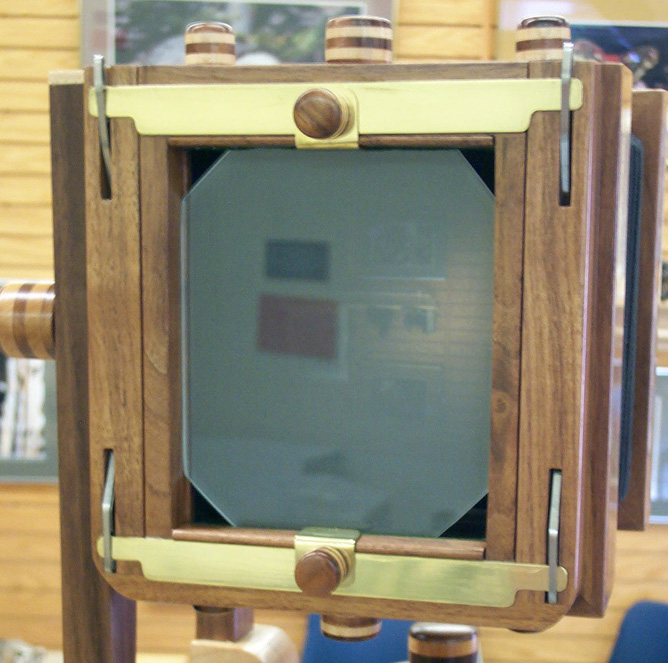
Spring Back Frame These are the most complex and exacting pieces of the camera. The spring back frame is fairly easy but needs to be completed using the film holder you are going to use to take pictures. Machine a piece wood to 1 1/18" width and long enough to cut four pieces on a miter saw. Machine out a 1/4" groove so the piece will fit nicely into the rear frame and will be flush with the sides of the rear frame when complete. Miter four pieces and glue them together. Once the frame is dry cut the internal dimensions to 4" X 5" on the band saw (it should already have internal dimensions of 4" X 4"). Now, center your film holder over the 4X5 hole you've just cut and mark were you want to route out the grooves for the notches on the film holder. Once those are routed and you are satisfied it fits and is centered top to bottom you can add the rails. Spring Back Your side and bottom rails are very important in making sure that your film holder is center and light tight on the spring back frame. I've made the measurements for these pieces so that the bottom rail should be flush with the bottom of your spring back frame and the side rails should be flush at the top of the spring back frame. The side rails also will hold the springs to hold the ground glass tightly to the spring back frame (and thus will also hold the film holder tightly to the spring back as well). This is done on my design by cutting a groove into the side rails the width of your spring metal (in this case the spring metal was 1/8" thick). I made the groove on a table saw by first cutting a groove 1/4" deep through the length of the side rails. Then I cut into the 3/4" square rail 1 1/4" in till I saw the saw blade cutting to the line I drew on the top of the side rail. Of course, this cut was aligned with the earlier cut. When I was done the piece looked like the drawing below. This allows room for the spring to bend up as need to accommodate the film holder or anything I wish to place between the ground glass frame and the spring back frame.
Once you have these pieces cut the hardest part is gluing them to the spring back frame. I used the film holder I normally use to take pictures as the guide and centered it on the spring back frame nestled in the grooves I cut earlier. First I glued the bottom rail on nice and tight against the film holder and centered on the spring back frame. Once this was dry I glued each of the side rails using clamps to hold them tightly against the film holder, bottom rail and spring back frame. It was a bit of a trick to get that many clamps holding that many parts but it can be done. You really want to use the film holder you plan on using so that it fits nice and tight into the rails once they are glued into place. Once all the glue is dry you can add brass inserts centered on all four sides of the spring back where the spring back will be held in place in the camera's back frame. These brass inserts will be used by the thumb knobs to keep the wood from getting gouged when you tighten the spring back into place. You'll be inserting the brass on all four sides so that you can rotate your camera back. I cut 1/4" square pieces of brass then used a chisel to gouge out to the depth of the brass. A bit of epoxy on each piece of brass will hold them in very nicely.
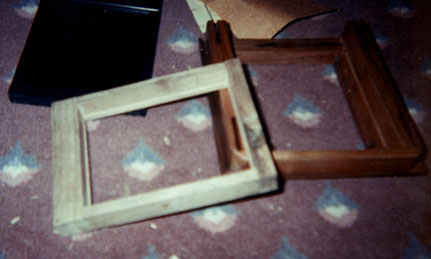
Ground Glass Frame This is a fairly easy piece to make, but it is the most critical. This will be the piece that ensures that what is focused on the ground glass is what you get on film. All you will do is glue four pieces of wood together with a spacer glued to the bottom. This is to both hold the ground glass in place and space it properly in relation to the spacing needed for your film holder. The dimensions shown below are for the inside of the ground glass frame only because the inside dimensions of the FINISHED rails of the spring back will determine the outside dimensions of the ground glass frame. You want a fairly tight fit between the inside of the rails on the spring back and the ground glass frame. Tight enough to ensure that there is no slop but you want it to move freely between the rails. The height of the ground glass frame will be determined by the height of the rails as well. In the spring back above the rail height is 3/4" so that is how thick the ground glass frame is as well. The top of the ground glass frame is thicker so that it is flush with the top of the spring back. Also, while you are making this frame, use your ground glass as a guide and to help you make a tight fit for ground glass when the piece is done. You can do the spacer that will hold the ground glass in position two ways. First off, the film holders have a space of 3/16" between the outside face of the film holder and the inside of the holder where the film is seated. Now, if you really want to get down to brass tacks you should count the thickness of the film into the equation too but I figured that the sanding required for finishing would bring the spacer into the .007 tolerance needed for fully focused film to match the ground glass image. You be your own judge. Now, the two ways to make this. The first would be to route the inside of the ground glass frame pieces to size. I think this would be a pain but it could be done. Next, you could cut a small strip to thickness on a table saw and glue it to the bottom. I found this is much more simple and painless. Make sure you do all four pieces required for the frame. I tried it with just the top and bottom and it really creates a problem trying to get the film holder in and out of the frame. After the pieces are dry cut the spacers off to allow you glue everything together as shown below.
When you get the four pieces of wood cut to size glue them together with a good frame glue and clamp them tight. This will ensure that it won't come apart on you later and will also ensure that you don't have to use screws (added weight and just don't look good).
One last thing needs to be done. You need to cut to thin 1/8" strips of wood 4" long and wide enough to fit between the ground glass and the top edge of the frame. These will be used to hold the ground glass in place (holdbacks). Well, that's it for the spring back and ground glass frame. I let you know what needs to be done to finish these pieces with brass, springs and knobs in the finish section. |