
|
|
|
|
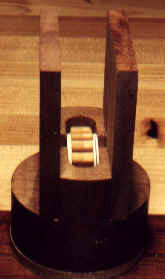
Slider Blocks For those of without access to a lathe this assembly could be constructed
with square blocks. These pieces were a lot of fun to build. I
started with a block of Walnut that was 3" X 3" X 3 1/2" with the
end grain to the sides. The placement of the end grain is important since
you will be cutting off a piece of the slider cap and so that the threaded
inserts will install nicely. (Threaded inserts tend to tear out end
grain) Drill a 2/8" hole dead center 1 1/2" deep. Cut off the
drilled end 1" thick for the slider cap. On the slider install your
2/8" threaded insert. Since you will be turning down the wood with
the end grain cut off the sharp corners and bring the piece down to round as
much as you can before installing it on the lathe. Use a piece of
2/8" threaded rod with two nuts to hold the pieces together (make sure the
grain is matched) then use a chuck on the lathe for turning. Turn the
piece down to round (just under three inches). Sand down to 600 grit and
apply a little finish (prevents checking). Figure out what you want the
front to be and mark it on both the slider and slider cap. Now to cut the
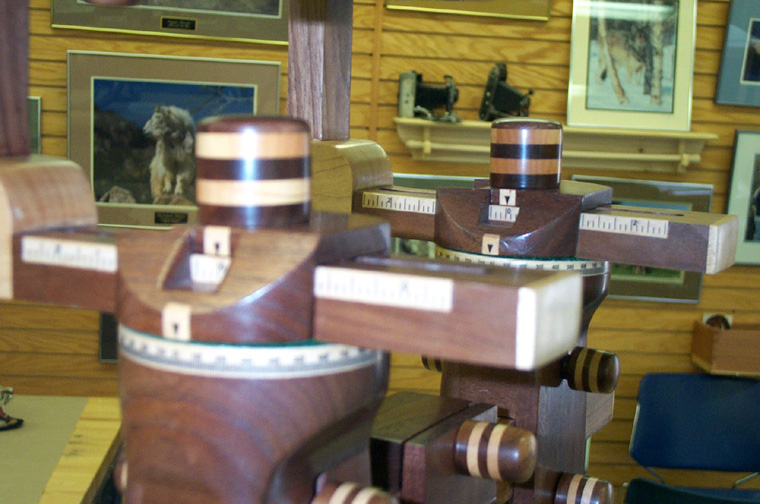
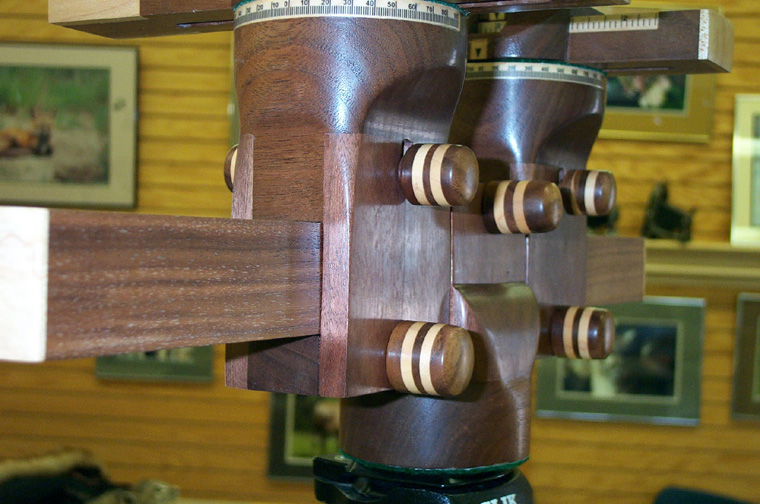
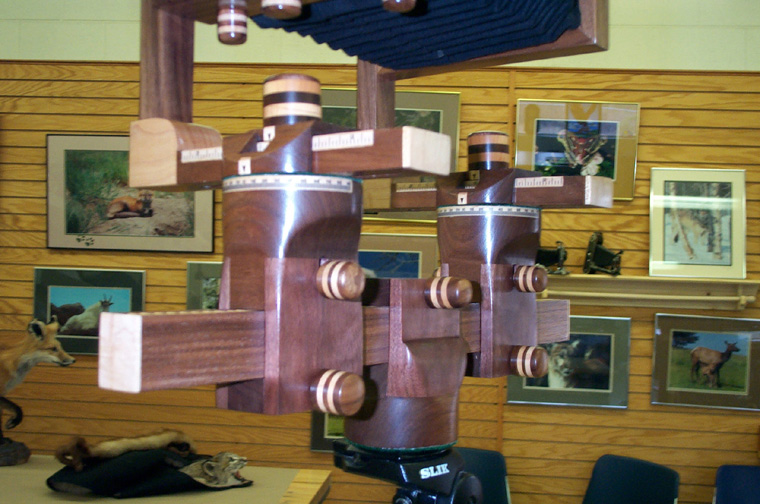
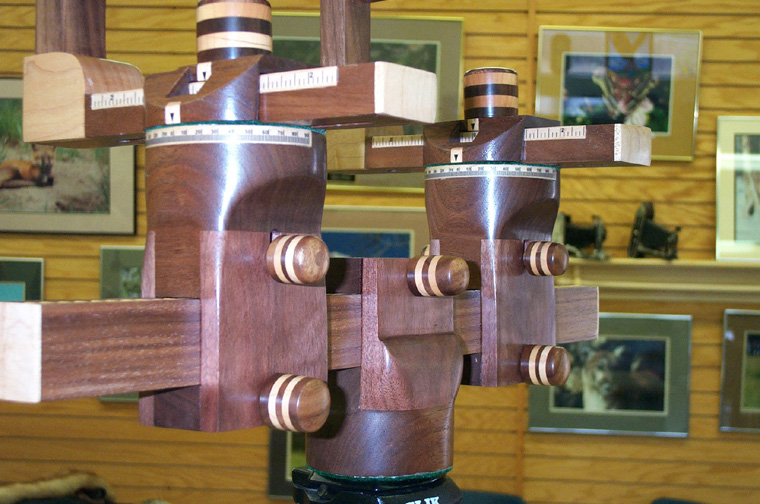
indentions for the side pieces that will hold the slider to the rail. One of three sliders you are making is the camera mount so DO NOT cut it for gears. If you plan on using a rack and pinion focusing system then use either a drill bit or mortise to cut a 2" long, 2" deep and 5/8" wide channel into the end centered on the platform you just cut. Also remember to cut the channels for the threaded rod you'll use for the gear knobs. The gear will have lateral movement to allow the gear to rise and fall as needed. You can see the channels I cut in the picture to the right. The dimensions for the channel are going to depend on how you make your gears. My gears have brass inserts through them that stick out about 3/8" either side of the gear so my channels are rounded at the bottom with just enough width to run smoothly with no wobble. If your gears do not have this make them the same width as the threaded rod you'll use for knobs. Now to install the side pieces. Cut 3/8" stock 2 1/2" X 3". Cut small channels centered in the bottom of the side piece for the gear knob threaded rod (if you are using gears and only for the geared sliders). Glue them to the sliders and they should look the picture above. The last thing to do for now is to drill holes for the springs that will push your gear into the rail. Drill the holes deep enough in the bottom of each channel so that when the gear is installed with the springs the bottom of the gear teeth are flush with the edge of the rail platform. The springs should provide the gear with a bit of give but be strong enough to ensure the teeth won't skip. At this point you can shape them as desired. You can see from the pictures how I decided to shape them, I gave each piece flowing curves. I used a Dremel tool, wood files, and chisels to do the shaping and each piece took me a couple of nights to finish. Once you have to rail done you can then fit the end piece and glue it in tightly against the rail. Make the fit tight but loose enough so the rail slides smoothly. Also, before the end piece goes on make sure the gear is finished and installed. Once the end piece is glued in you would have to cut it off to do any work on the gear. Once you have the end piece cut dry fit it with the rail and drill a hole for the tightening knob through the end of the slider and centered on the end piece. DO NOT DRILL COMPLETELY THROUGH. Just drill enough to start the hole in the end piece. Now take the end piece out and finish drilling the hole through the end piece only. Install a 1/8" threaded insert into one end of the hole on the end piece. When glued in the threaded insert should be on the opposite side of the hole you drilled into the slider. Only the side with the threaded insert should be glued and cut the end piece wide enough to just fit. I used a piece of plastic wrap as a spacer and to ensure the rail didn't glue to the slider. Once the glue is dry remove the rail and use a band saw to cut the end piece on the side that wasn't glued about the width of the band saw blade. This will give the slider enough give to be able to tighten it to the rail but it won't really be wide enough to notice. For the mounting slider you can install a 2/8" threaded insert in the end to attach it to your tripod, or, if you need another kind of connection for your tripod now would be the time to set that up. Slider End Cap
After you cut the two channels for the standard you need to cut the angle for the back of the end cap. I used a belt sander for this and that made quick work of it. After the angle is done you can cut the window and add the maple inserts. That is all done with a chisel and patience. Finish the cuts to your desired look, sand and finish. Rail
Rack and Pinion Focusing
Since this is such a complex process if you have any questions or I was unclear please email me and let me know.
|

 You
will be cutting into the slider block so that there is a 1" deep X 1"
wide platform. I cut these on the band saw by drilling a hole through the
miter block for the saw and installing the slider with threaded rod and nut so
the front faced directly up. Cut in from the ends first then you
finish the cutout free hand.
You
will be cutting into the slider block so that there is a 1" deep X 1"
wide platform. I cut these on the band saw by drilling a hole through the
miter block for the saw and installing the slider with threaded rod and nut so
the front faced directly up. Cut in from the ends first then you
finish the cutout free hand. 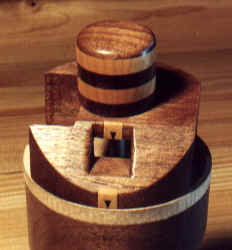 The
Slider End Cap is all that is left for the sliders. You will only need two
since the slider that attaches to the rail doesn't need one. I did most of the work
for this on a band saw. Remember to match the grain between the slider and
end cap first before you do any cutting. First, cut the channel to fit the lower leg of the
"L" on the standard. I did this by cutting the sidewalls so that
the front and rear of the end cap are perpendicular to the standard. Cut
to depth first then cut almost to the depth line in a series of passes to make
waste removal easier. For the indent cut to allow the standard greater
travel I cut 3/4" in from the sidewall Since all that was left after the
band saw was a bunch of thin strips of wood this was easy for a chisel. To
clean out the bottom of the cut I used the chisel and a block of wood cut to
width with a piece of 60 sandpaper stuck to it. It took a bit of time but
was easier and safer than a router on this type of cut.
The
Slider End Cap is all that is left for the sliders. You will only need two
since the slider that attaches to the rail doesn't need one. I did most of the work
for this on a band saw. Remember to match the grain between the slider and
end cap first before you do any cutting. First, cut the channel to fit the lower leg of the
"L" on the standard. I did this by cutting the sidewalls so that
the front and rear of the end cap are perpendicular to the standard. Cut
to depth first then cut almost to the depth line in a series of passes to make
waste removal easier. For the indent cut to allow the standard greater
travel I cut 3/4" in from the sidewall Since all that was left after the
band saw was a bunch of thin strips of wood this was easy for a chisel. To
clean out the bottom of the cut I used the chisel and a block of wood cut to
width with a piece of 60 sandpaper stuck to it. It took a bit of time but
was easier and safer than a router on this type of cut. 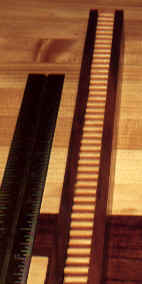 The rail
is fairly easy. 16" long X 1" wide X 1 1/4" high. Be
sure add the length of your ends if you plan on gluing an end insert on each
end. Be careful of your sanding on this piece or cut slightly larger to
sand down to dimensions or the rail will be too small for the sliders.
Also, beware that if you aren't careful sanding you can introduce a slight bow
into each side of the rail making it thinner in the middle than at the
ends. If you are going to add the rack and pinion focusing cut a dado to
the width of the rack and deep enough so that the top of the teeth will be flush
with the top of the rack. After it's all glued and sanded add your finish.
The rail
is fairly easy. 16" long X 1" wide X 1 1/4" high. Be
sure add the length of your ends if you plan on gluing an end insert on each
end. Be careful of your sanding on this piece or cut slightly larger to
sand down to dimensions or the rail will be too small for the sliders.
Also, beware that if you aren't careful sanding you can introduce a slight bow
into each side of the rail making it thinner in the middle than at the
ends. If you are going to add the rack and pinion focusing cut a dado to
the width of the rack and deep enough so that the top of the teeth will be flush
with the top of the rack. After it's all glued and sanded add your finish.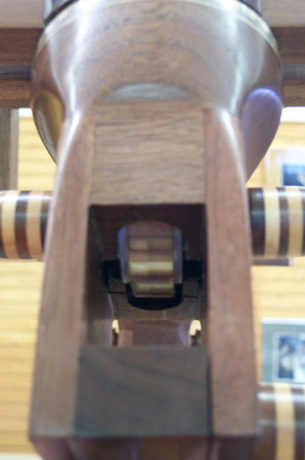 These aren't the easiest things to cut and if you try it
by hand be very patient. The key is to make sure that your pivot is
perfectly parallel to the teeth so you don't have any run out. There is a
really good explanation on how to make gears with a router in Taunton Press's
"
These aren't the easiest things to cut and if you try it
by hand be very patient. The key is to make sure that your pivot is
perfectly parallel to the teeth so you don't have any run out. There is a
really good explanation on how to make gears with a router in Taunton Press's
"